
I picked up Super Street Fighter IV on sale at Kmart for $20. I was curious about the title, since it had ushered in something of a renaissance for the fighting game genre. Marvel vs. Capcom 3, a revamped Mortal Kombat, and SoulCalibur V all followed within a couple years, not to mention a slew 2D fighters both new and old. They're even making two separate Street Fighter/Tekken crossover games, just because they can.
Truth be told, I'm not much of a "fighting game guy." The last one I played with any regularity was Mortal Kombat: Deadly Alliance during my college days (on the GameCube, of all things), and before that it was Tekken 3 on the original PlayStation. This lack of practice was immediately apparent as soon as the disk hit the tray, as I proceeded to get my ass handed to me ten ways from Sunday. And I don't even mean by the 10-year-olds I usually face in Halo; I expect them to destroy me. No, here was the computer was kicking my ass. Even on normal difficulty, I couldn't even get past the third fight.
") |
| PWND. (That's me on the right.) |
 |
| By far the best deal for a beginner stick. |
We'll start with the stick, which was a relatively simple job. Replacing the entire stick assembly would have required extensive modifications to the casing, so I opted for the simpler option of replacing a few key parts to improve the existing stick. My main goal was to make the stick feel tighter and more responsive, so I ordered a new spring and pivot cylinder.
 |
| Square vs. Octagonal restrictor gates |
But I also wanted to replace the restrictor gate, which is a piece of plastic that limits the range of the joystick to keep it from moving too far in any one direction. Japanese sticks typically use restrictor gates with a square-shaped hole, but these make certain special moves more difficult. Think about the inputs for Ryu's classic Hadouken: ↓, ↘, →, Punch. Basically a quarter-circle, from "south" to "east," and then a punch button. Doing this motion in a square gate, it's easy for the stick to get caught in one of the corners, interrupting the flow of the movement. But replace it with an octagonal-shaped gate, and circular movements become much easier.
So with all that in mind, I ordered the following parts from Lizard Lick:
Sanwa GT-Y Octagonal Restrictor Gate
Sanwa JLF-P-4 Pivot Cylinder
Seimitsu LS-32 Spring
Seimitsu LB-39 Bubble Top, Red
Tek-Innovations Arrow Dustwasher
(The bubble top and the dustwasher are just there to look pretty.)
With all the parts on hand, it was time to open up the casing and do some surgery. The screws holding the bottom plate in place required some kind of weird tri-shaped screwdriver, but I was able to jury rig it with a small flat-head. Here's what the inside looks like:
 |
| It was at this point that I began to rethink the entire exercise. |

The switches were only held in place by some posts sticking through the holes in the corners, and easily lifted out. With the switches gone, I was actually able to remove the entire stick assembly by simply unscrewing the ball top.
 |
| The stick assembly lifts right out. |
 |
| Stick assembly, disassembled. |
 |
| A new pivot cylinder to make the stick a little more stable. |
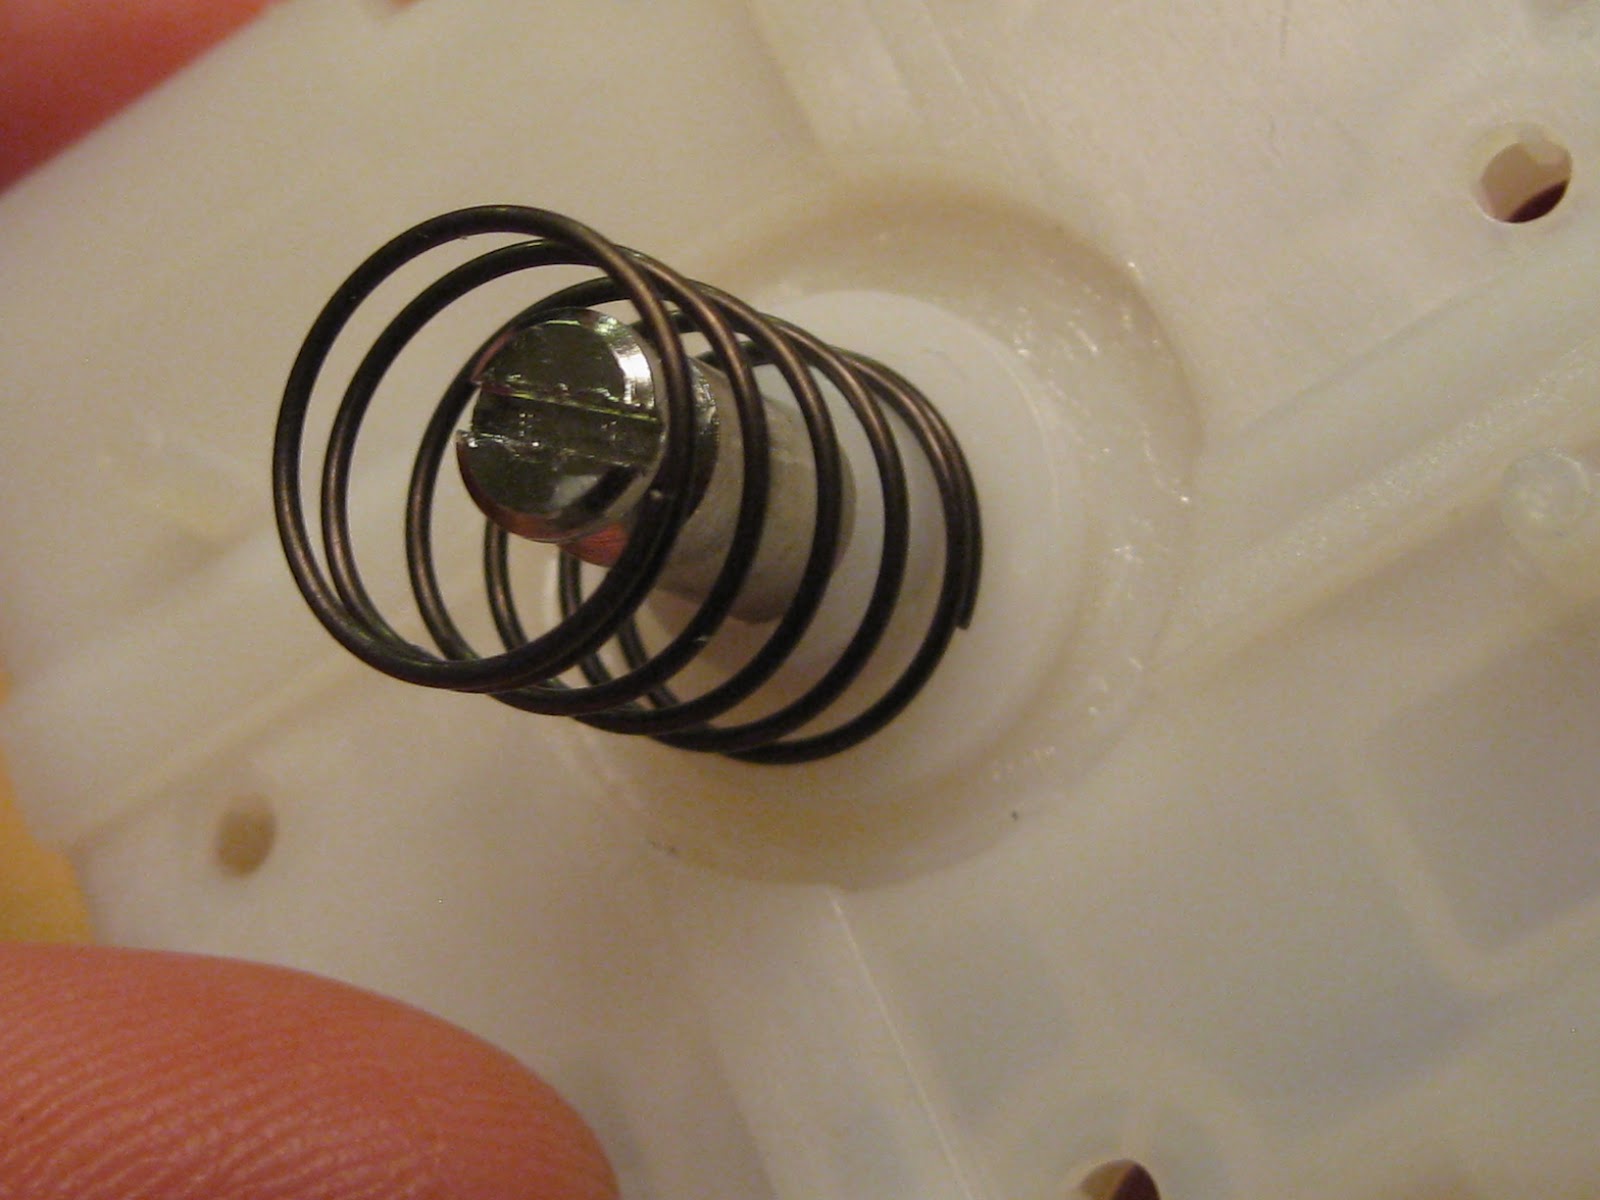 |
| A new spring to keep movements tighter and more precise. |
 |
| Pop the top back on... |
 |
| ...and voilà! |
The restrictor gate was a little more complicated. It's a Sanwa part going into a Hori product, so it didn't fit the way it was intended to. Specifically, the screw holes in the Sanwa gate are not in the right place, which leaves the octagon tilted at an odd angle. Making it fit required creating some new holes, but fortunately, there are indents in the plastic in the exact right locations, which made drilling a whole lot easier.
 |
| Drill, baby, drill. |
 |
| Fully (re)assembled. |
 |
| Preeeettttttyyyyy....... |
Okay, my original aim was to write about the entire modification, but this post has become super long and I haven't even gotten to the buttons yet. And the buttons were a much more complex (and mistake-prone) process, so I'm going to save those for another post. I hope this helps anyone who is trying to mod their own stick-- feel free to shoot me any questions!
Edit: Part 2 is up!
I'm so, so, deeply happy about everything that happened here.
ReplyDeleteIt's time to come out of the geek closet, Grambo.
DeleteThank you for this little Tutorial, I think this will help me.
ReplyDeleteThis might be a bit late, but I found this post with a google search :)
ReplyDeleteI just bought this stick bundle used for around $30 and, while it is my first arcade stick, the stick part of the stick (...) instantly felt weird. Guess this explains why! Looking forwarding to modding my own, thanks for sharing!
Most welcome, and happy modding! If you're just looking to do the stick, it's a super-easy mod. I just got a new MadCatz Super Street Fighter IV TE stick, I may do another mod tutorial one day...
DeleteOh and BTW, Lizard Lick is sadly no longer in business. But you can still find all of these parts at FocusAttack.com, which has become the new favorite of the fighting game community.